[ 63XC.COM | HOW TO | CHEAP HUB ]
Cheap hub
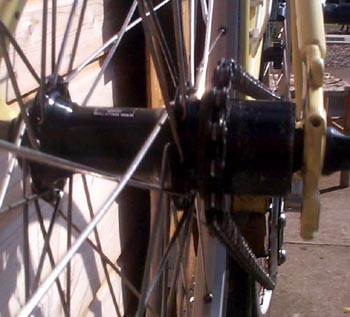
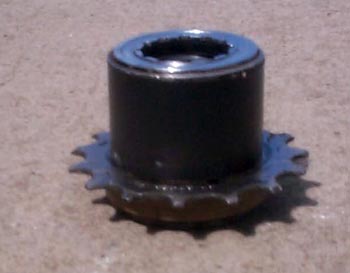
When you're a kid, certain events have a big impact. Some of my formative memories of growing up in the late 50s relate to a guy who lived in the next village, a cyclist with a track bike. We all pestered him for a shot, because it was just so mind-blowing to see him pedal backwards. One day he did let us try, but of course we just fell off. However, it always stuck in my mind that fixed gear bikes are special, just because they are so contrary. Now that I've got back into biking, I've finally been able to satisfy that lifelong hankering for a fixie of my own. However, being a Scotsman, the thought of having to buy all the necessary bits was a bit hard to bear. The Scots don't have a monopoly on being tight, so the following should be of interest to y'all (and also relevant for offroad fixers). I worked out that the cheapest way forward would be to convert a Shimano freehub. This would let me re-use bits I already had in the garage and build my fixie for nowt. If I hated the result, then what the hell! My original intention was to weld the two halves of the freehub together, but this seemed a bit brutal. Besides, I wanted to find out what was inside the freehub. (Shimano units are reliable to the point where you never need to take them apart.) The process of dismantling turned out to be a bit tedious. Since the result proved less durable as I hoped, I'll skip the gory details. In essence, what I did was fit two short lengths of allen key between the inner and outer bodies in a space that looked like it was made to accommodate a third pawl. After my modifications, the two halves were locked together, but drive was still transmitted via the pawls, and in theory my modifications were reversible. This had a subtlety which pleased me. The next stage was to dismantle an old 8spd cassette for a suitable sprocket and spacers. A freehub gives you plenty of room to get the chain alignment spot on, so I just used a couple of the spacers behind the sprocket and a piece of pipe cut to length on the outside, holding the whole assembly together using the original locking ring. Once the wheel was ready, I fitted it to an old Raleigh racer which I'd always thought was too small for me. I had to cold set the rear end to take the 135mm hub. Oddly enough, now that I've fitted a longer seatpost and stem, the bike feels just right. In fact, it makes my other bikes feel big! Nor does there seem to be any problem using sprockets shaped for gear changing, as long as the chain is kept reasonably tight. If you need to change the gearing, it's easy enough to find an old cassette with a suitably-sized sprocket.
I used my new fix for a couple of months on my commute, then gave it to my son in an attempt to get him hooked on fixies too. Unfortunately, he managed to trash the freehub. Since he had left the innards a bit worse for wear, I reverted to Plan A and welded the whole thing together. All this required was to pick out the seal at the back of the unit and weld (brazing would be better) over the top of the ball bearings. The advantage of this method is that you don't have to dismantle the freehub so there is no risk of the two halves getting out of alignment. The downside is that it's permanent. Well, by this time I was well and truly hooked on fixies. With my son using the Raleigh, I had to get another. I opted for a new Fuji Track, which I just love. It's lighter than the Raleigh and more nimble; really better in every way. Makes me feel like a kid again, but I still fall off when I pedal backwards!
[ TOP ] |
Writer
Gordon Mathieson is a 50 something born again biker. In his next life, he wants to win the Tour de France.
Date
v1.0 written June 2004
Related
Dennis Bean Larson has an excellent article on respacing gearie wheels for fixed gear use.
Legal
As always, you ride and work with machine tools, welding and brazing equipment at your own risk. 63xc.com and Gordon Mathieson are not liable for any damage you do to yourself as a result of reading this article.
Mailing list
Join the 63xc.com list.

